Embarking on a creative journey into the world of mosaic art can feel like stepping into a vibrant, yet complex, universe. Whether you’re a complete novice or someone who has dabbled in craft projects, the term “beginner mosaic” evokes a sense of exploration and discovery. This article invites you to peel back the layers of the medium, uncover its historical roots, and learn how you can start creating your own mosaic pieces with confidence.
What Is Mosaic, and Why Does It Matter?
Mosaic, as a fine art form, is the assembly of small, often geometric, fragments of materials—such as glass, stone, ceramic, or even recycled objects—to form a larger image or pattern. The word itself comes from the Greek “mousa,” meaning muse, hinting at the creative inspiration behind each piece. From the ornate floor tiles of ancient Roman villas to contemporary public art installations, mosaics have woven stories into walls, pavements, and public spaces for millennia.
- Historical Significance: Ancient mosaics decorated the floors of Roman baths, the ceilings of Byzantine churches, and the facades of Greek temples. They served both decorative and narrative purposes, often depicting mythological scenes or daily life.
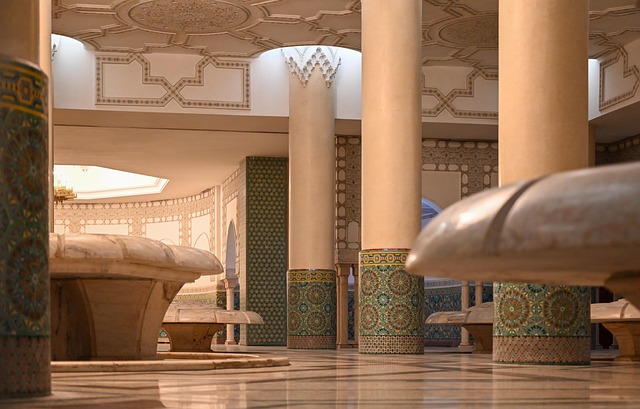
- Cultural Influence: In the Middle Ages, mosaic art flourished in Islamic architecture, with intricate tilework adorning mosques and palaces. During the Renaissance, European artists revived the technique to enhance frescoes and religious icons.
- Modern Resurgence: Today, mosaics are celebrated in public art projects worldwide. They can transform urban landscapes, celebrate community heritage, and provide accessible entry points for emerging artists.
Materials You’ll Need
As a beginner mosaic enthusiast, you don’t need a vast collection of expensive tiles. A few essential items will give you a solid foundation:
“The beauty of mosaic lies in its accessibility. With a modest kit, anyone can start turning their ideas into vivid, tactile art.” — Art Workshop Guide
- Tiles or Tesserae: Starter sets often include small square pieces of ceramic or glass in various colors. You can also repurpose broken dishware or even old crayons.
- Adhesive: A strong, quick-drying medium such as an epoxy or a dedicated mosaic cement helps secure the tesserae to the substrate.
- Substrate: Canvas, wood panels, or even thick paper can serve as the base for your mosaic. For outdoor projects, concrete or brick works well.
- Tools: A small trowel, a sponge for smoothing, and tweezers or pliers for precise placement.
- Protective Gear: Gloves and a mask to avoid dust and keep your work area clean.
Planning Your First Project
Before you start placing tiles, a clear plan ensures the process runs smoothly. Begin by selecting a simple design—perhaps a geometric shape or a repeating pattern—so that you can focus on technique rather than complex imagery.
- Choose a Theme: Think about colors, moods, or even a story you want to convey. For example, a sunrise could be captured with warm oranges and soft reds.
- Sketch the Outline: Use a pencil to lightly draw the perimeter of your chosen design on the substrate. This outline acts as a guide, preventing mistakes.
- Color Blocking: Assign each color to a specific area of the sketch. Start with a limited palette to maintain visual harmony.
- Test Pieces: Before committing to the full design, experiment with a small section to see how the colors interact.
Step-by-Step Mosaic Construction
With a plan in place, you can begin the actual construction. The process involves layering adhesive, placing tesserae, and finishing with a sealing layer.
- Apply Adhesive: Spread a thin, even coat over a small area of the substrate with your trowel. Avoid over-application to prevent sagging tiles.
- Place the Tesserae: Gently press each tile into the adhesive, using tweezers if necessary for precision. Hold briefly to ensure a secure bond.
- Remove Air Bubbles: Lightly tap the area with a rubber roller or use a damp sponge to smooth out any trapped air.
- Let It Set: Allow the adhesive to dry according to the product’s instructions—typically 24 hours for full cure.
- Apply Grout (Optional): For a polished look, mix a light grout and apply it over the tesserae. Wipe away excess with a wet sponge before it dries.
- Seal the Surface: Once the grout is fully dry, a clear sealant protects the mosaic from moisture and wear.
Common Challenges and How to Overcome Them
Even the most seasoned mosaic artists encounter setbacks. Here are a few typical issues faced by beginners and tips to address them:
- Misaligned Tiles: Plan in small increments and double-check placement before the adhesive dries.
- Uneven Surface: Use a high-quality, level substrate and ensure the adhesive spreads uniformly.
- Color Bleed: Keep your color palette separate and apply grout promptly to prevent mixing.
- Delamination: Proper surface preparation—cleaning and priming—ensures stronger adhesion.
Expanding Your Horizons
Once you’ve mastered a basic mosaic, you can explore more advanced techniques and creative possibilities:
- Mixed Media: Combine mosaic tiles with fabric, paper, or natural elements like shells for a textured effect.
- Portrait Mosaic: Use a wide range of colors to capture subtle shading and realism.
- Functional Art: Create mosaic countertops, lamp bases, or decorative tiles for home décor.
- Community Projects: Collaborate with local artists or schools to produce large-scale public mosaics.
Resources for Continuous Learning
Learning never stops in the mosaic realm. Below are curated resources that can help you deepen your knowledge:
- Local art schools offering mosaic workshops.
- Online tutorials on video platforms—many are free and focus on beginner projects.
- Books such as “Mosaic: A World of Art” that cover history and techniques.
- Community forums where artists share tips and critique work.
Final Thoughts
Embarking on your mosaic journey as a beginner is an invitation to experiment, learn, and contribute to a centuries-old artistic tradition. Each small tile you place becomes part of a larger narrative—whether that’s a personal expression or a communal statement. By mastering the fundamentals, embracing experimentation, and seeking continuous improvement, you can transform simple materials into enduring works of fine art. The path from novice to skilled mosaicist is paved with patience, creativity, and a willingness to keep placing one tessera after another.